For this years quilt along, we have designed 4 quilts using precuts! We love being able to get an entire line, or simply have less prep work before we start sewing, and pre cuts are a perfect way to accomplish both!
What is pre cut fabric?
When we are referring to pre cuts, we simply mean a group of fabric that has already been cut to a specific size. They go by different names depending on the manufacturer, but there are standard sizes throughout the industry.
Charm Packs refer to 5" squares
Layer Cakes are 10" squares
Jelly rolls are 2 1/2" strips x WOF
These are the three most common sizes, you can also find skinnier jelly rolls that are 1 1/2" strips and mini charm packs that are 2 1/2" squares.
The benefit of pre cuts is that you can get right to sewing and also that you can easily buy an entire line of fabric at an affordable rate. Not all fabric collections will come in pre cuts, but enough do that you should easily be able to find one that is perfect for you!
Fabric requirements
Finished size: 59 1/2" x 80 1/2"
For this quilt we are going to need 1 full jelly roll (2 1/2" strips x WOF) which means it has at least 40 fabrics in it. Some may have more or less, so double check the description. If you do find a roll you love and it has a couple less, you can still use it for this quilt, it will just be a little bit shorter (and you'll use less background strips).
You'll also need a half jelly roll of your background fabric (20 strips). If you prefer to cut your background from yardage, you'll need 1 1/2 yards to get 20 - 2 1/2" strips.
Help! My pre cut has pinked edges!
This is very common and helps to minimize fraying. Don't stress it. Just line them up and sew as normal. To determine if you should count your 1/4" seam from the outside point or inside point of the pinked edge, simply measure your specific jelly roll to know where the 2 1/2" lies. For this particular pattern, it's not important to be super accurate, so you can even just pick what side you want to use. This really is a perfect beginner pattern to just get used to piecing.
Making the Quilt
This first thing we need to do is cut all of the strips down to matching sizes.
For the background strips cut:
40 - 2 1/2 x 20" strips
You will be able to get 2 strips from each 2 1/2" strip of fabric.
For the print or focal fabric strips cut:
40 - 2 1/2 x 40" strips
On these strips you'll really just be cutting the selvedge off. I like to measure from the fold so I can easily fit it under my ruler and on my cutting table.
Now, match up 1 - background strip to 1 - focal strip and sew them together along the short end.

Repeat until you have 40 - 2 1/2 x 60" strips (really 59 1/2" after we account for the seam).
From here we are going to sew strips together along the long side to form groups of two. When decided what strips to use, just get a nice mix of lights and darks together, making sure that matching fabrics aren't sew into one set. You are going to flip one around so that you are alternating the direction.

Remember to sew all the strips in the same order. I started with a focal fabric on top always to make sure that when holding up by strip set I could always have a focal fabric in the top left corner and a white fabric on the bottom left corner (when facing myself).
After you have sewn sets of 2, continue sewing sets together to make 10 sets of 4 strips, again, keeping the focal fabric in the top left corner. You will also need to make sure to match up the seams across blocks. We want there to be a nice straight line where the background and focal fabrics are sewn together when the quilt is done.

Putting the Quilt Together
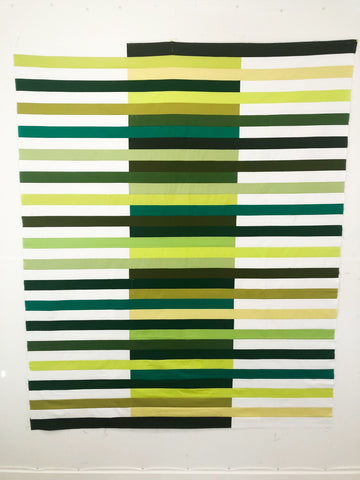
Now that we have strips of 4, lay out your quilt. This is your opportunity to move the strip sets around until you like the final layout.
After you have decided on the final layout, sew your strip sets together in sets of two, continuing until you eventually have two halves. Always make sure to keep the top left a focal print and matching up the seams across the strips.
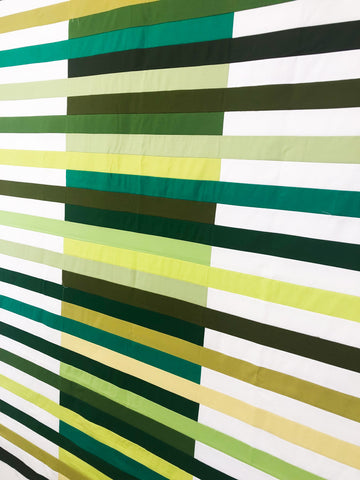
This quilt top is now done and ready to quilt! I'm going to be putting border designs across the focal strips and straight lines in the white sections. I will just be using white thread for everything because I do most of our quilts in just white.

When is the Next Pattern Coming?
We will have 4 pre cut quilt patterns to make throughout the year, one each quarter, so you can plan on the next pattern to be out in May! In the meantime we'll have other tutorials and projects to keep you busy.
If you have any questions, don't hesitate to reach out!
Happy Quilting,
Kimie and Missy
