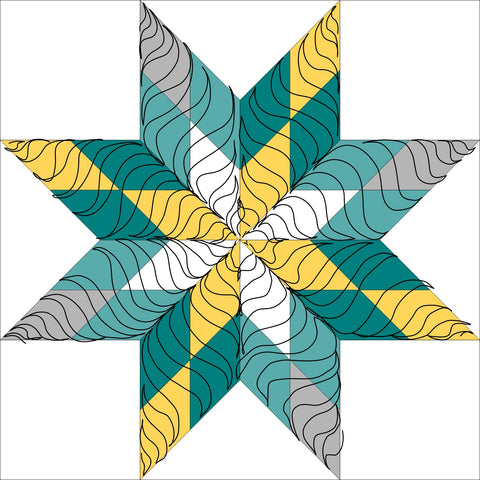
Block 11 is a mini lone star quilt block and I have lots of fun ideas and ways to approach quilting it. Don’t forget to scroll down to print out your blank block copy so you can doodle along and come up with your own ideas!
Quilt Block Design 1
For this design, I quilted the yellow and dark green areas as different elements, but then combined the light green and gray into one continuous element around the block. By connecting those areas, it makes it appear as if the yellow and dark green diamonds are sitting on top of the other blocks, creating foreground and background. I also opted to leave the white areas in the star as background and would quilt them to match the other white background areas in the quilt.

Quilt Block Design 2
For this design, I swapped things a little and combined the yellow and dark green diamonds into one element, filling each of them with a feather. After that, I separated out the light green and gray areas, again leaving the white as background. I always like to mix curves and straight lines in my quilting elements to add contrast and interest to the final plan. These lines also work to draw your eye between the other quilted elements.

Quilt Block Design 3
When deciding how to quilt this version of the lone star block, I chose to use the white area as part of the star and not the background A fun echo and fill makes the center star area really stand out. For the outside diamonds, I chose a mix of straight lines and ribbon candy to break up the space. I think this design almost has a snowflake feel to it and now I want to go make a whole quilt of this block out of blues so I can make them all into snowflakes.

Quilt Block Design 4
For this final design, I kept it simple and did the same serpentine lines in each of the large diamonds. I did alternate the way I curved so that it looks as if there is a spine separating the yellow and dark green from the opposite diamond. This quilting plan is going to add lots of soft movement to the final quilt.
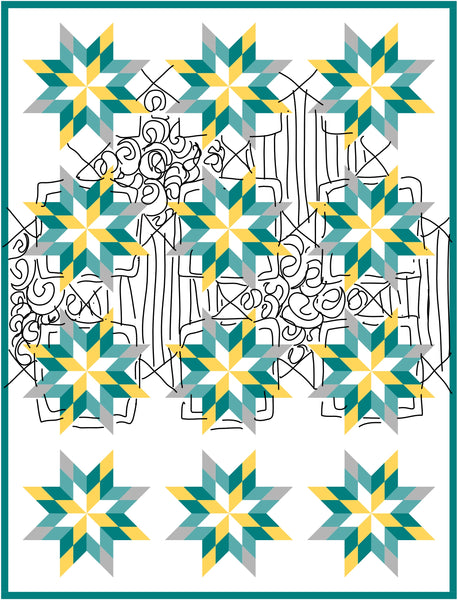
Full Quilt Design 1
For this plan, I wanted to show a couple different ways you could break up the background space. This design creates a frame around every other star, but by echoing around the background stars in the empty squares, it also offsets them from the background so that they don’t get lost. You could then go in and use your favorite quilting fills or different straight lines to fill in all the background areas.

Full Quilt Design 2
With this quilting plan, I created a matching frame around each of the lone star blocks. By setting this frame so that the star overlaps the edge, it makes it look like it’s behind the star and really creates a definite foreground/background, making the stars pop off the quilt. After that, I connected points to create a checkerboard in the background, then chose two contrasting fills to alternate in the empty space.
Click the images below to print out a blank copy of the block so that you can doodle and draw and come up with your own quilting plans. Feel free to take elements from my ideas, use the entire quilting plan, or come up with your own design entirely!


Happy Quilting!
Kimie and Missy
